Search for:

4 SOAPSonar – Using Automation Data Sources

In Tutorial 2 we got started with REST and SOAP service, using design view and doing a unit test. In Tutorial 3 we chained the response from one service to be a request for a second service, creating a mash-up test between REST and SOAP services to run in Run View. In this tutorial we going to show how to use an external source like a .csv file for automating a range of values. This is represented in the test cycle by variables and data sources. 

Why use Automation Data Sources? Well lets say you need to test a range of users, or values. Take Canadian postal codes as an example. There are 845,990 Canadian postal codes. Yet when testing, you may not need to test all of them. However each province, has 1 or more letters that start the postal code for the region. All BC postal codes starting with V. There is 18 possible start letters, each mapped to a given area. If your percentage coverage requires validation of address by checking postal code to province and includes testing negative scenarios, you could be required to run the same test case through 20 or more unit tests. If you have read more detailed service plan costing, you can see that 20 unit tests through many test iterations can add significantly to testing costs. The challenge however is to do this, without spending too long on the test creation or maintenance. If each release requires new scripting, the value of automation greatly decreases.

I am going to first use the SOAP calculate service, but show a JSON service example afterwards.

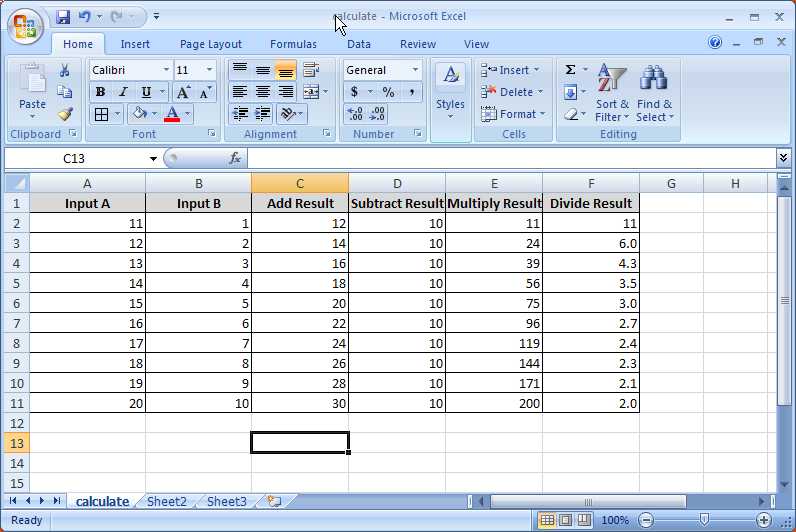
1. Lets first create our data source. There are many places on the web to find already created data sources, but in this case, I will use MS Excel to create one and save it as a CSV. I created 6 columns, input A, Input B and then the expected results for each service. I have only 10 lines, but you can make these much longer. Here is the calculate csv file for you to download.

1 Create csv

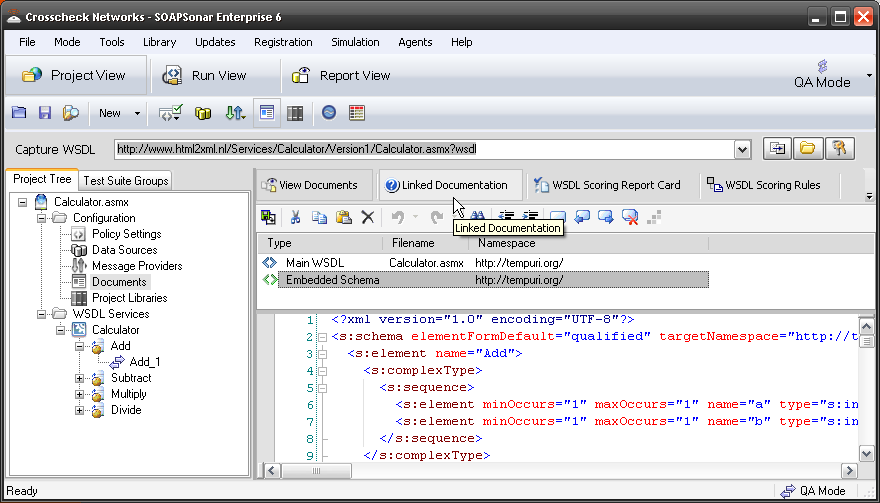
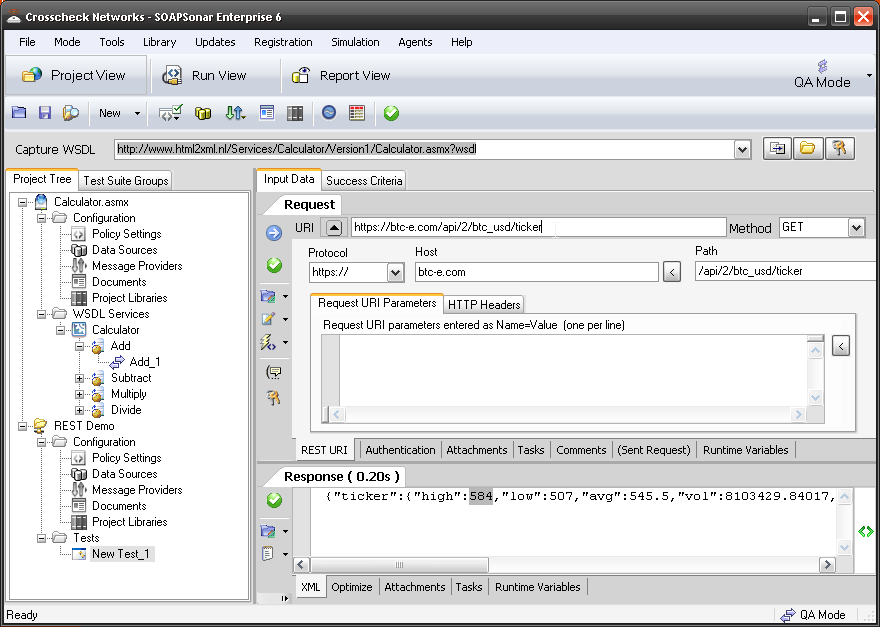
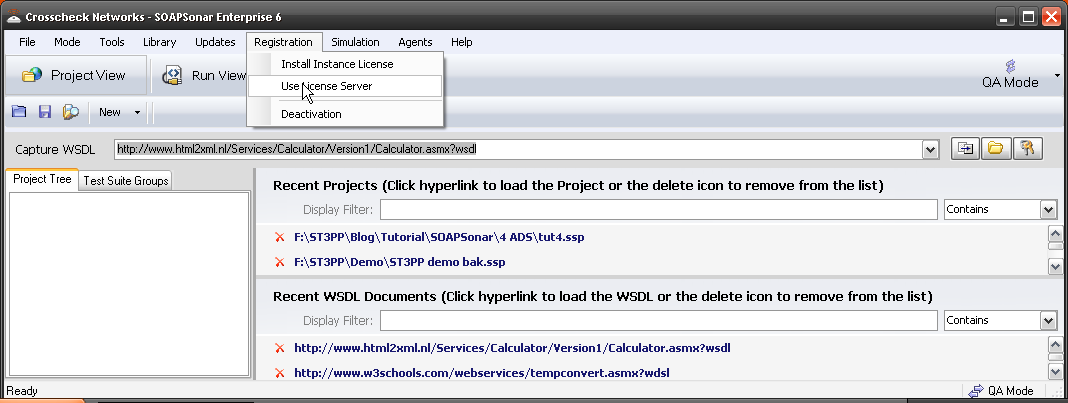
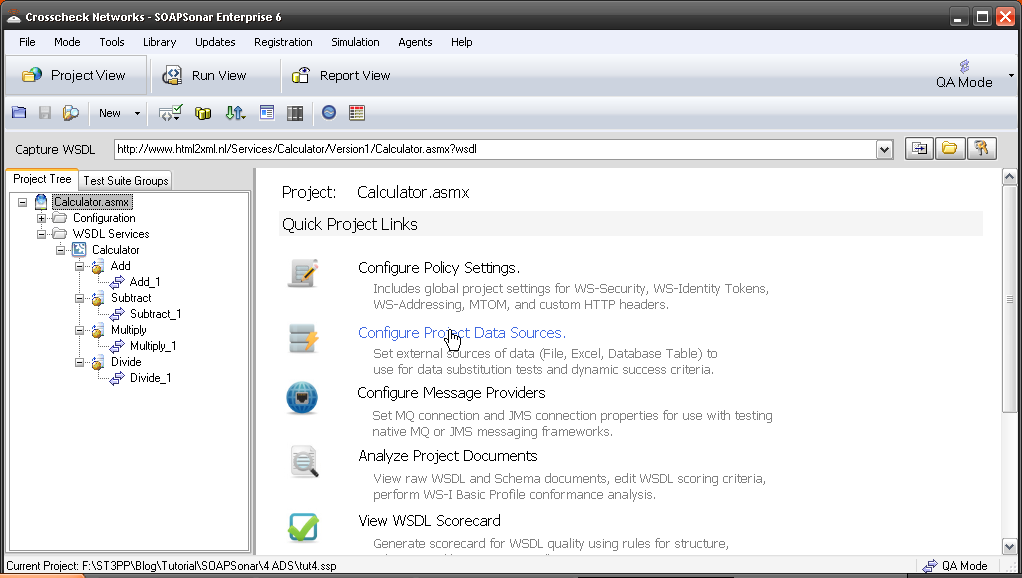
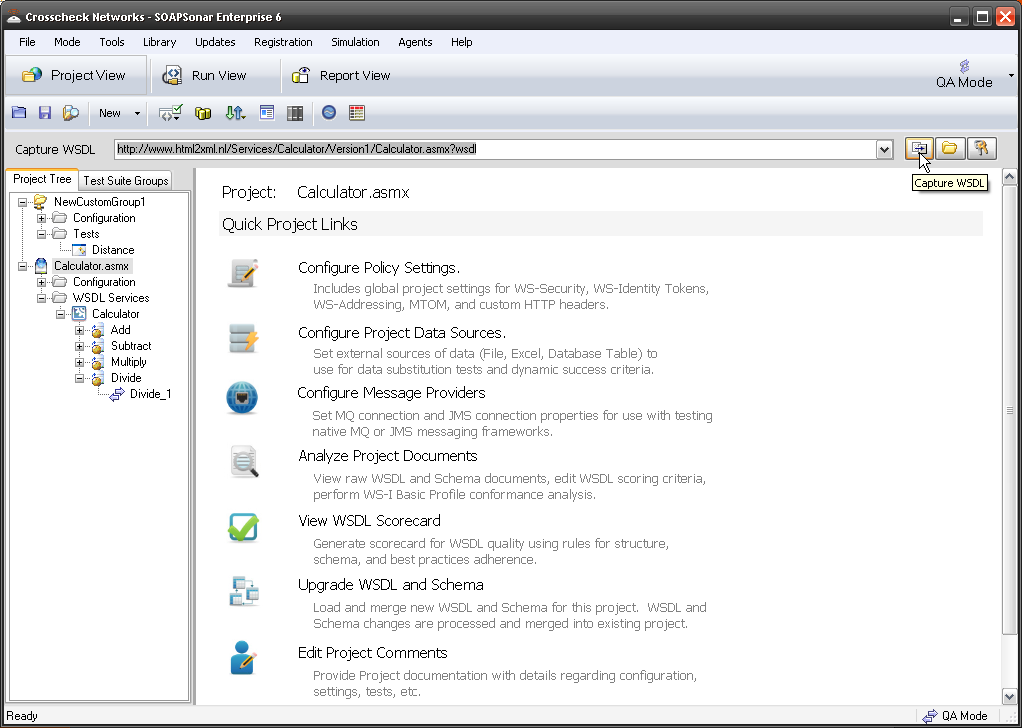
2. Run SOAPSonar (with Admin Rights) and in the capture WSDL bar paste http://www.html2xml.nl/Services/Calculator/Version1/Calculator.asmx?wsdl. and press enter. Select Configure Project Data Sources. Here we define any Automation Data Sources we may use.

2. Config data sources

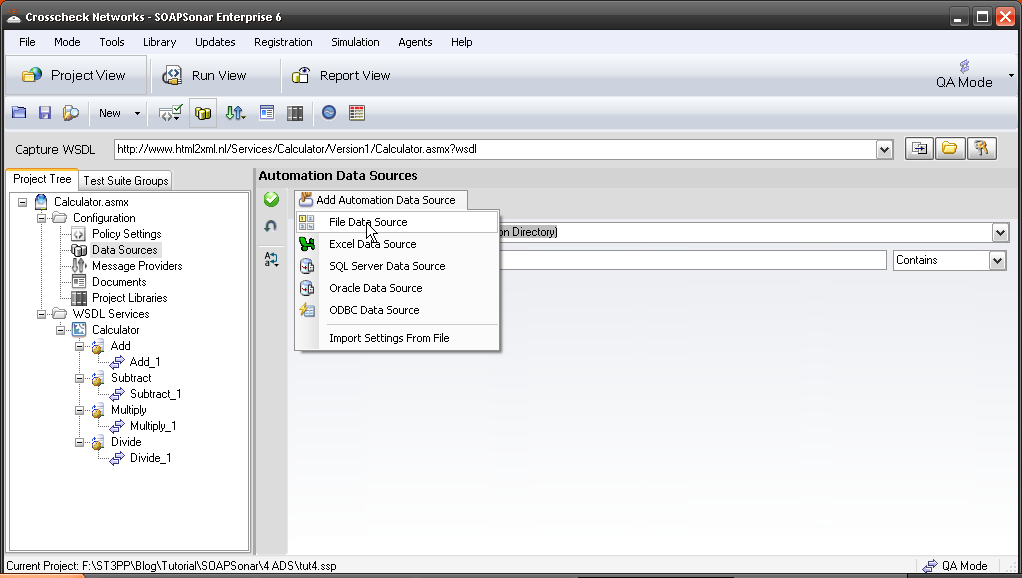
3. Now select Add Automation Data Source. You can see that ODBC, SQL, Oracle, Excel or File bases data sources are supported. Select File Data Source for .csv.

3 Add data souce

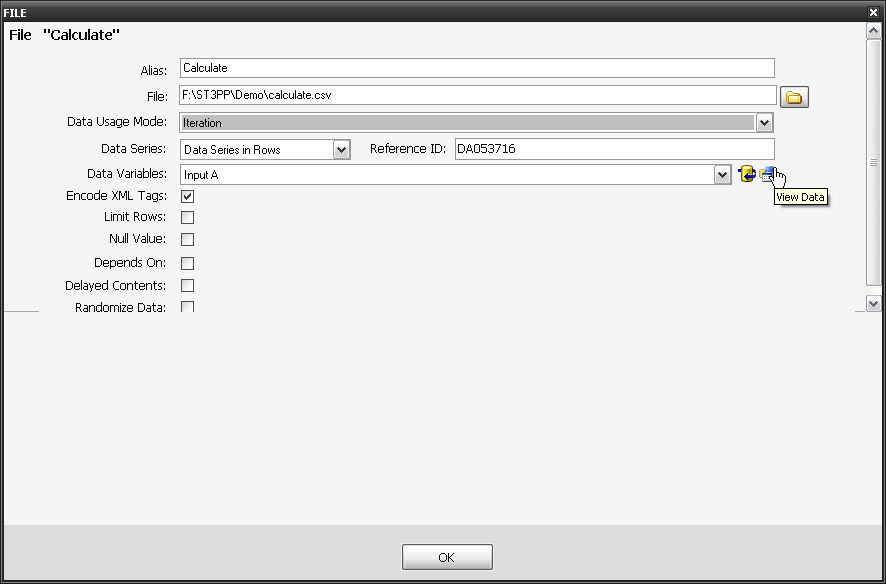
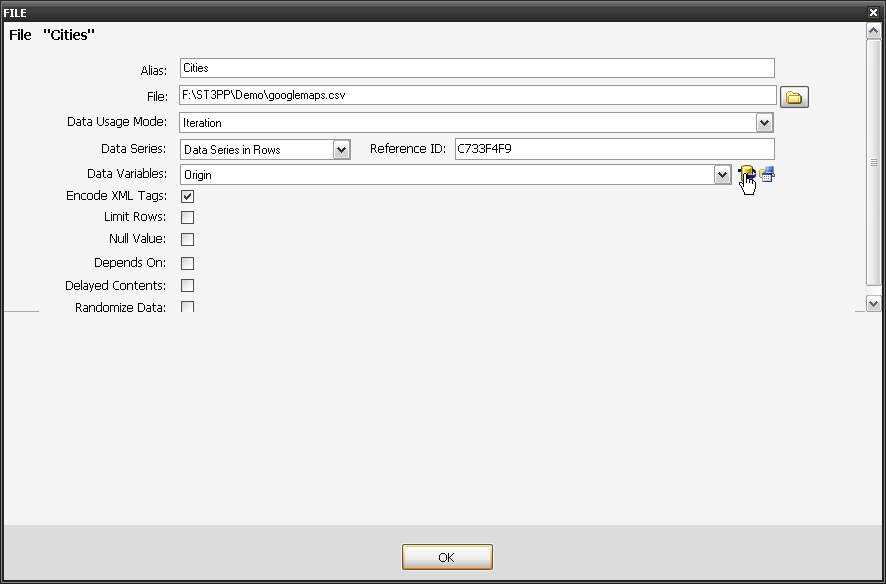
4. Give your Data source a Alias, Locate the .csv file you downloaded and ensure its still Iteration, and Data Series in rows. On the right of Data Variables field (were my curser is), select the option to refresh data and view data. Do you now see your .csv file? Select OK.

4. Refresh

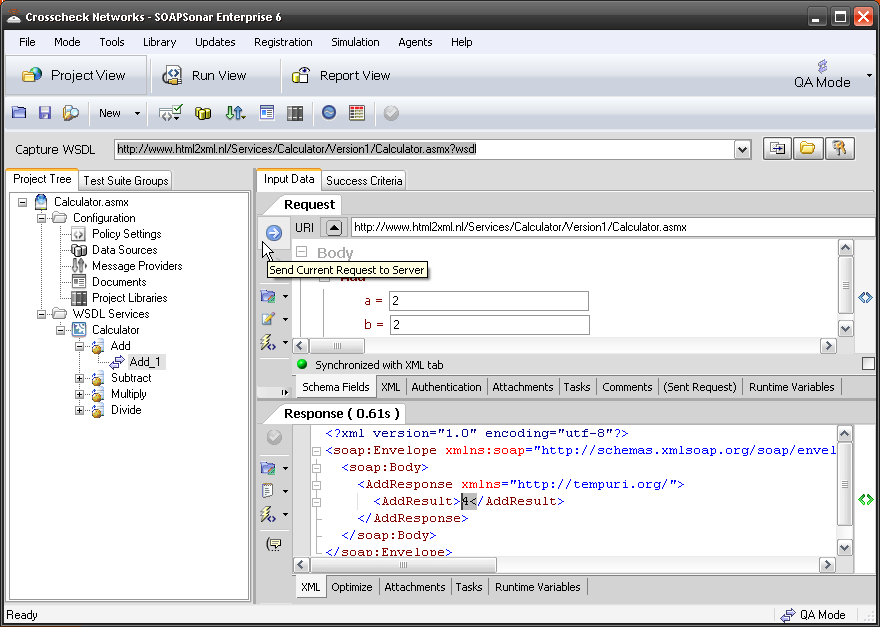
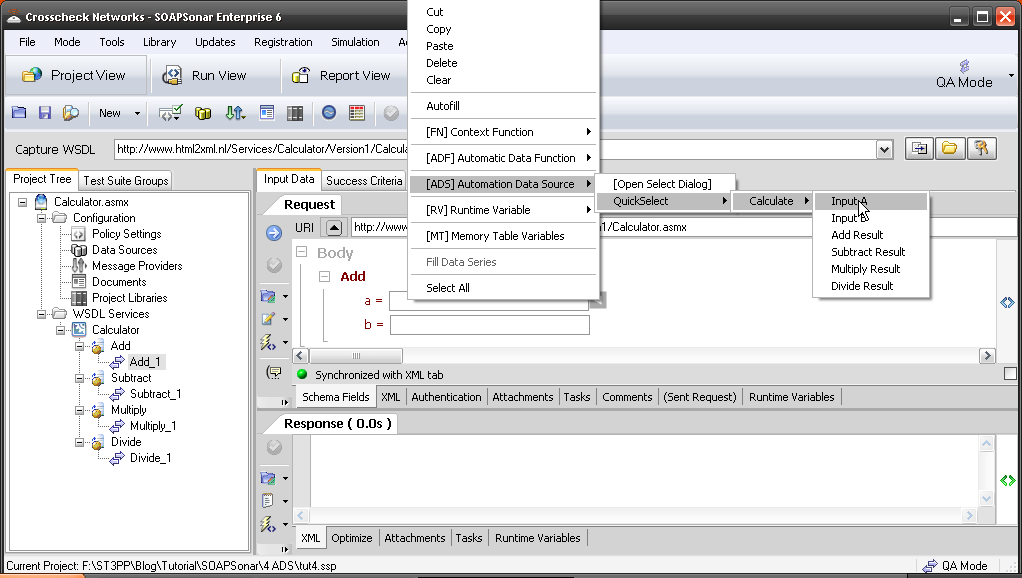
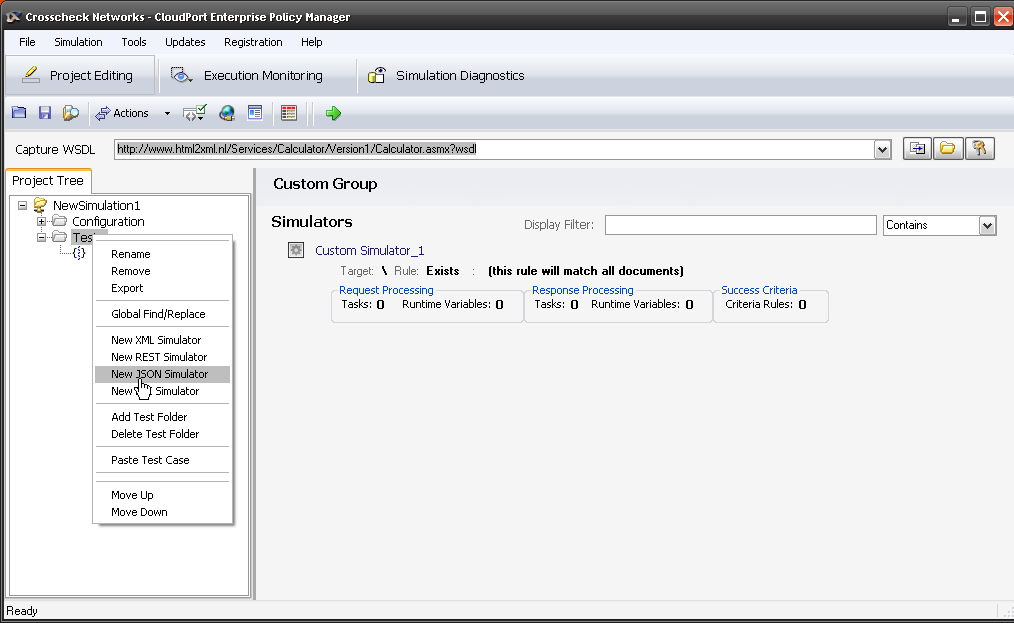
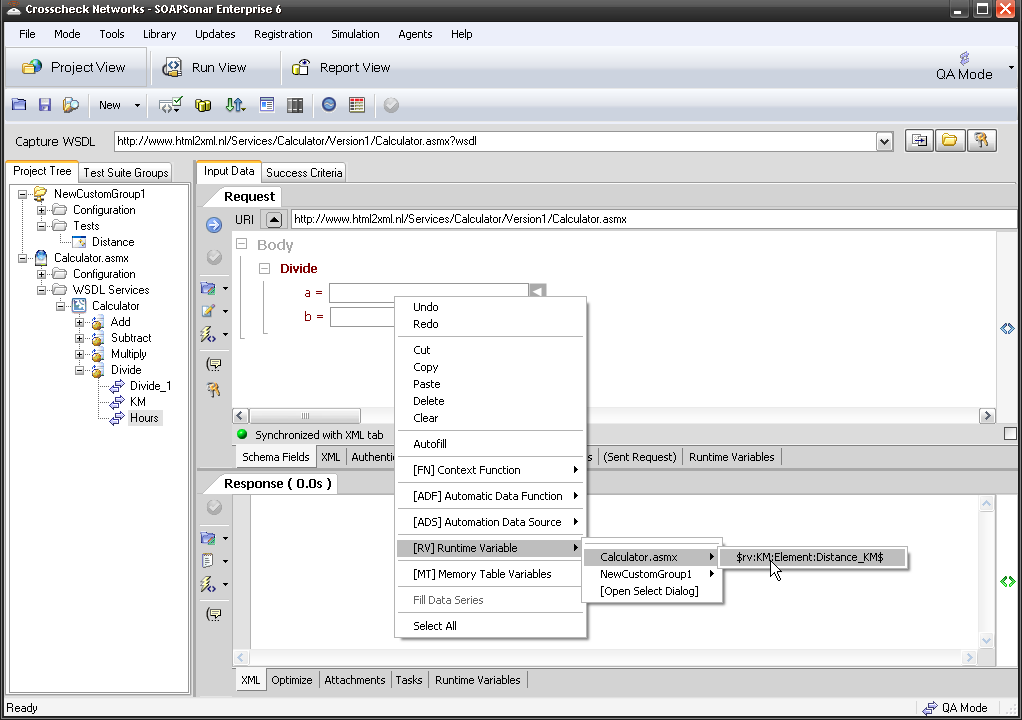
5. Now lets use that Data Source on the Add_1 function. Make sure you are in Project View, and QA mode and Select Add_1. Right-click in a= field and select [ADS] Automation Data Source, Quick Select, Your Alias (mine is calculate), Input A column. do the same in b= field selecting Input B. Commit the test settings.

5. Project view

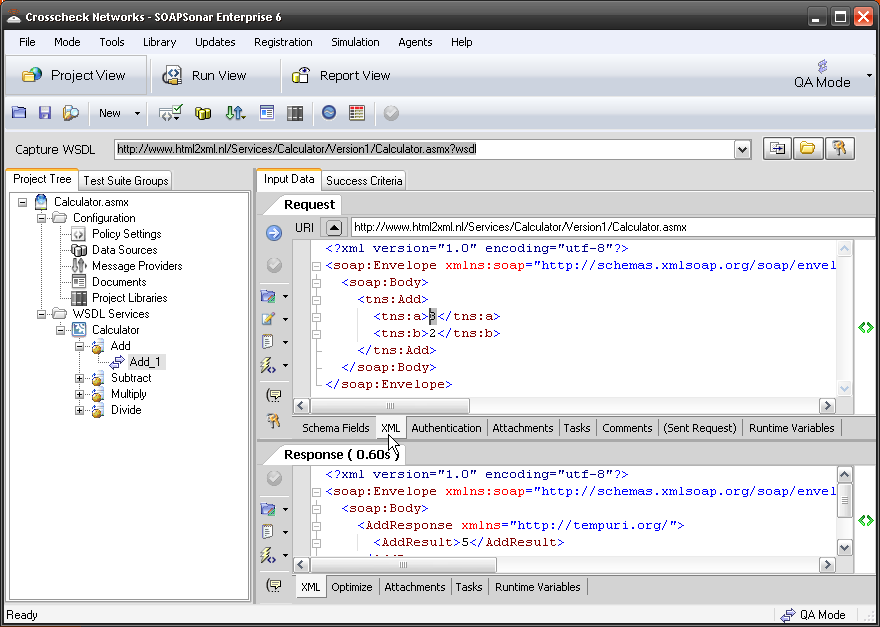
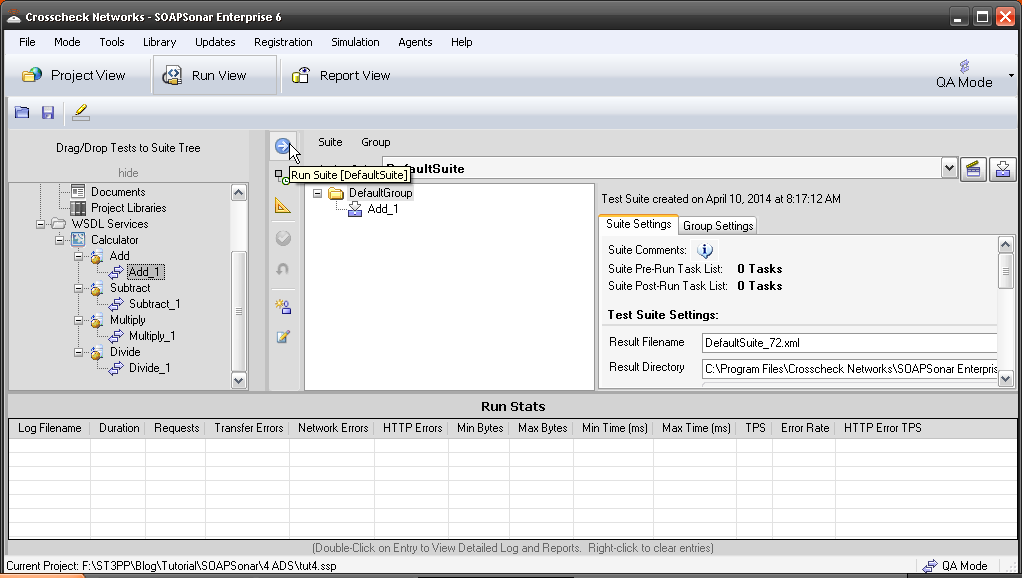
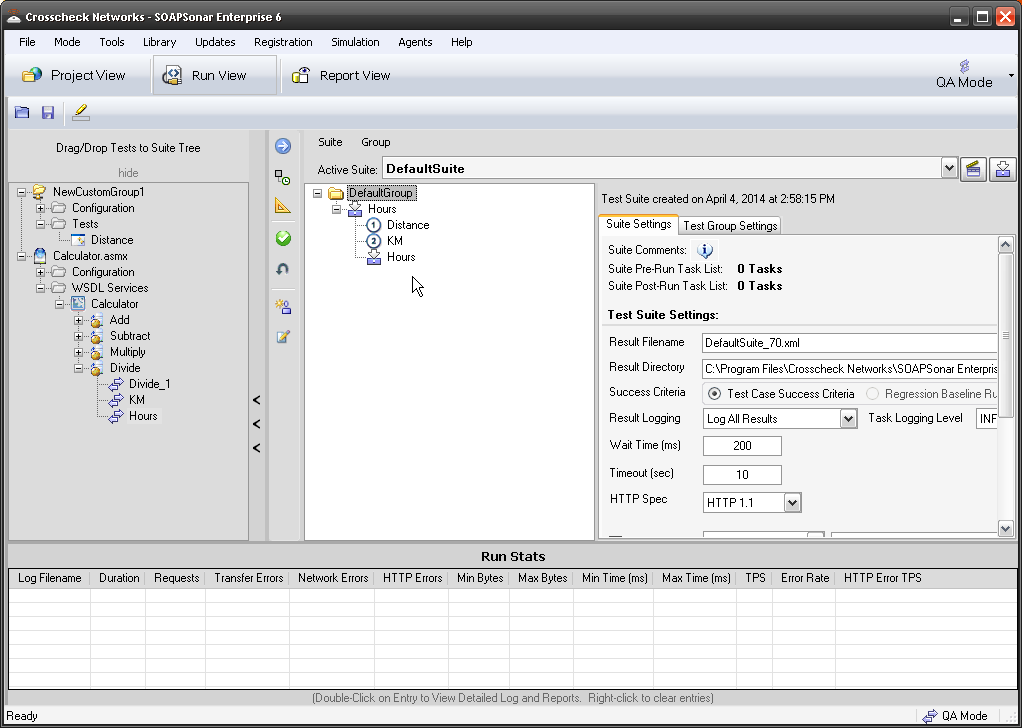
6. Now select Run View, and Drag Add_1, under the DefaultGroup. Commit. How many test case did you expect run? Run Suite to execute the test suite.

6 run view

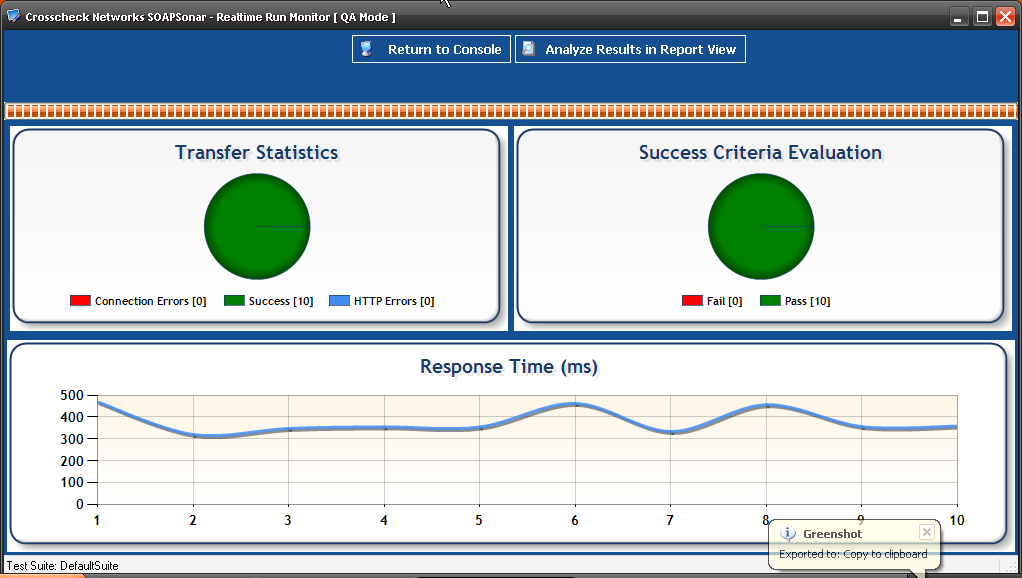
7. You can see I ran through the entire csv file rows, or 10 test cases. You can Analyse These Results in Report View, but we will leave that and Success Criteria for another tutorial.

7. Results

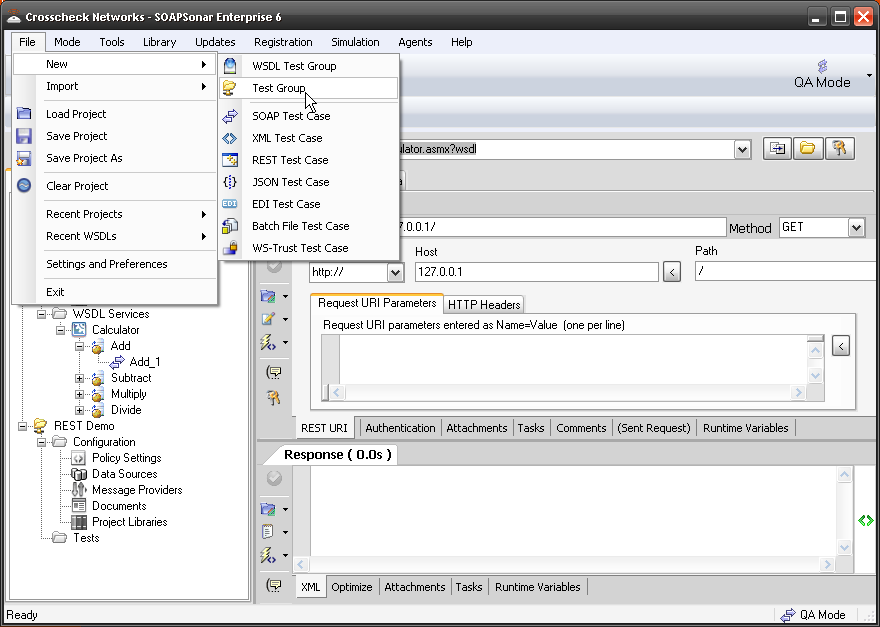
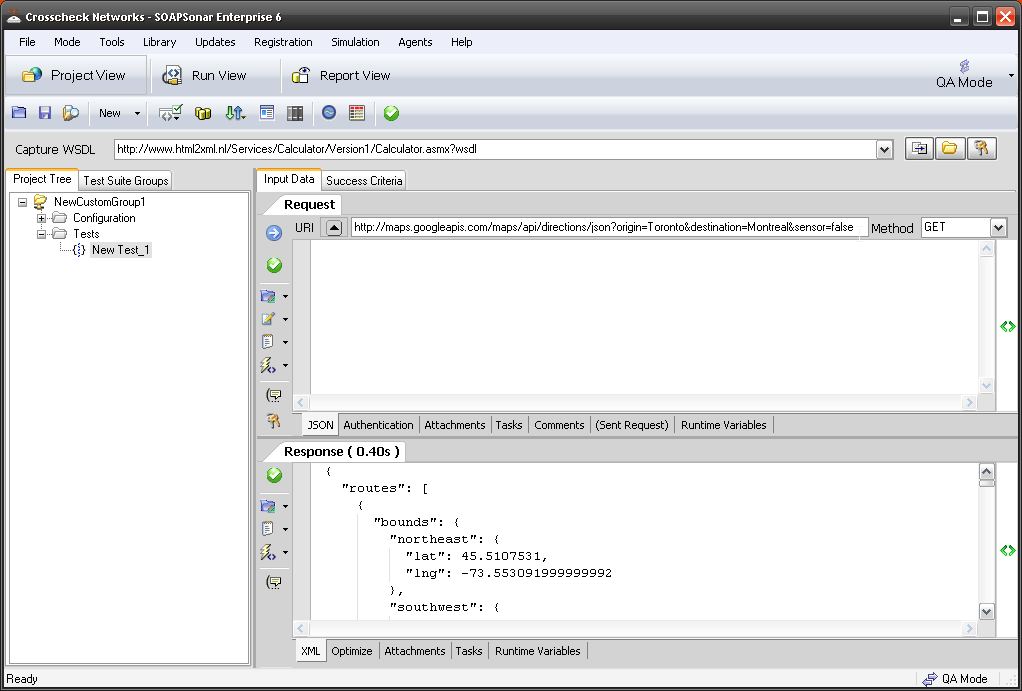
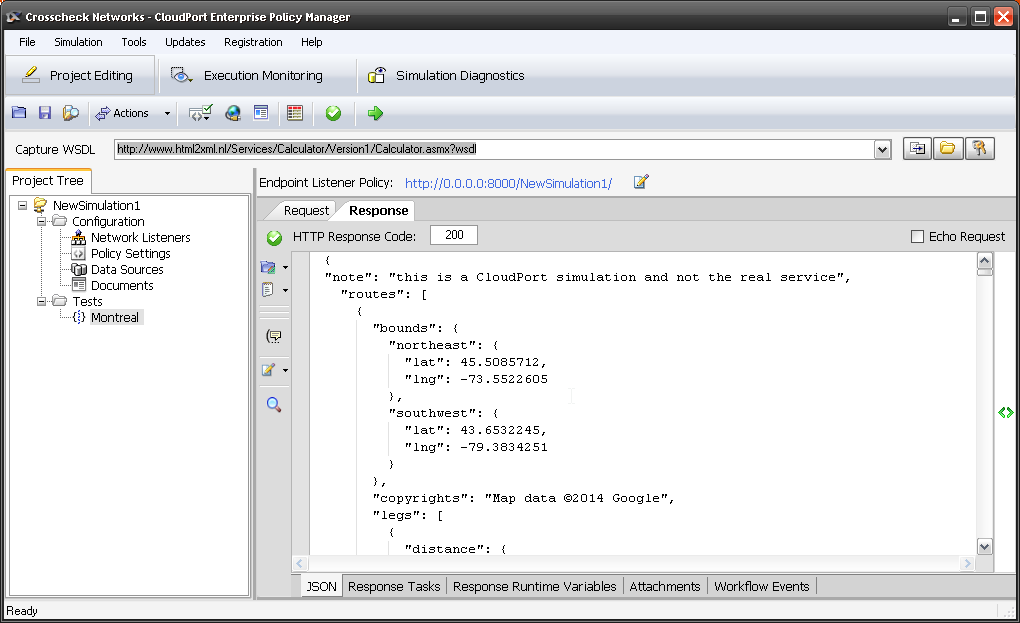
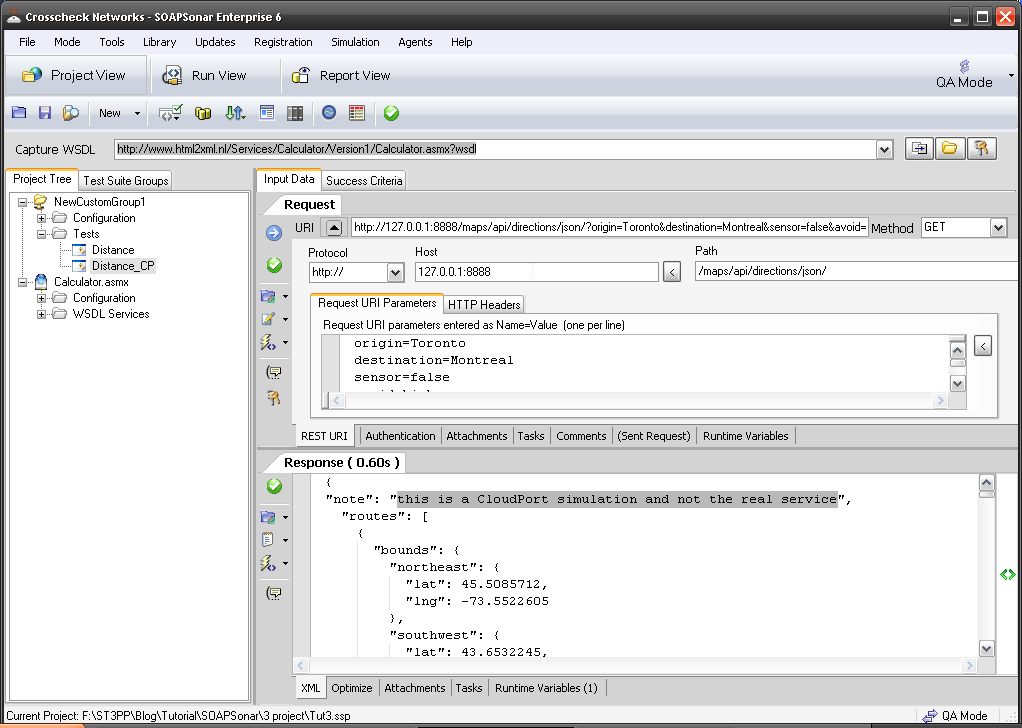
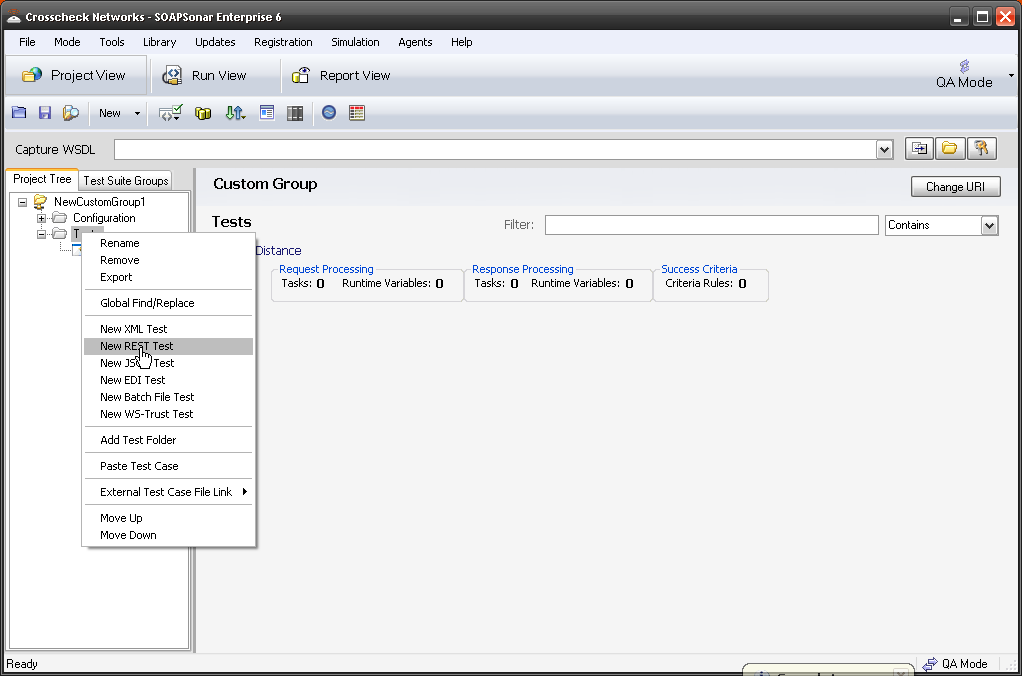
8.Lets try this with JSON. File, New Test Group. File, New JSON Test Case and paste http://maps.googleapis.com/maps/api/directions/json?origin=Toronto&destination=Montreal&sensor=false into the URI and make sure method is GET.

8 Google URI

9. Lets add our data source  Add this googlemaps .csv file to you Data Sources as a file data source. Remember to refresh and check it before saying OK.

8. maps

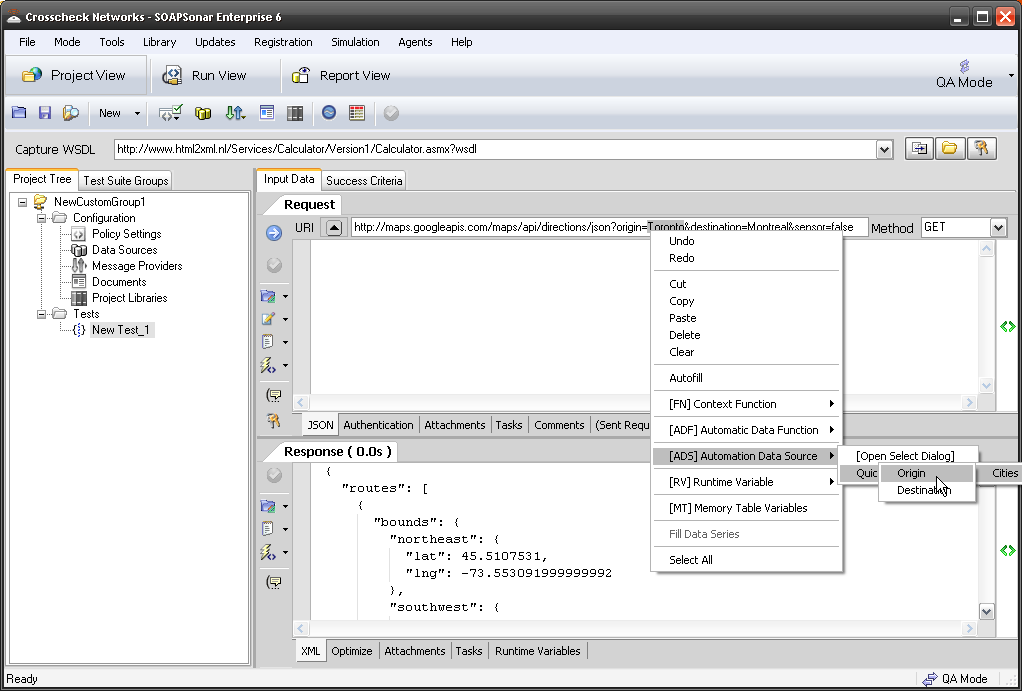
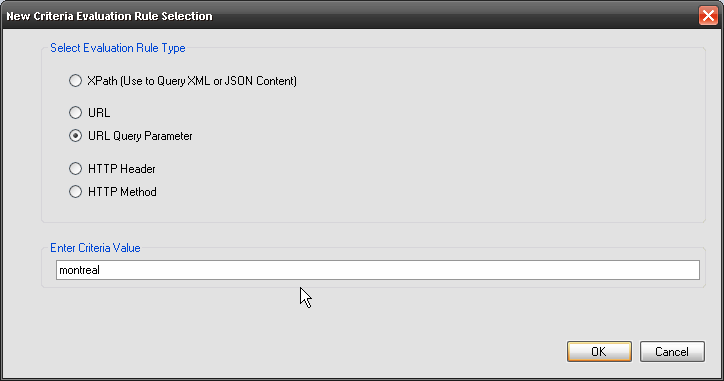
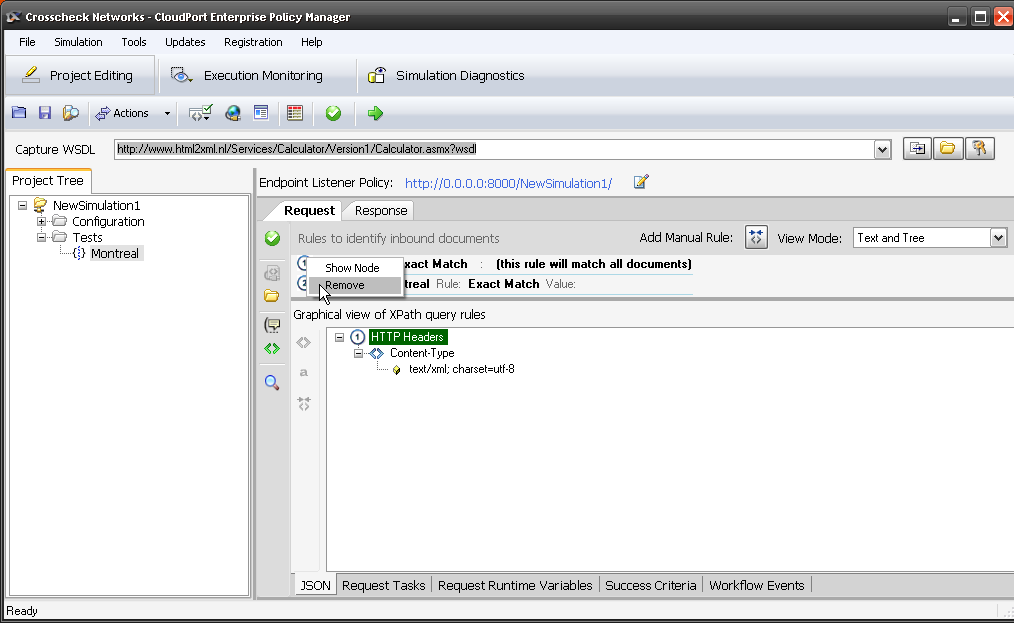
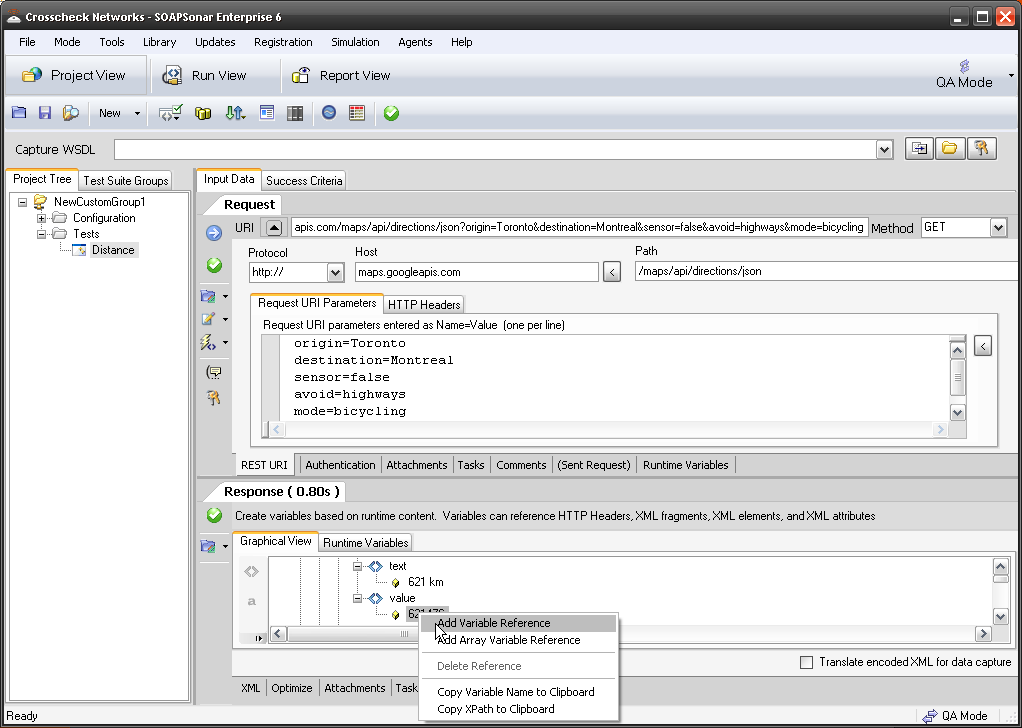
10. Now in the URI highlight (delete) toronto and right-click (insert) and select [ADS] Automation Data Source, Quick Select, Cities, Origin. Do the same for montreal. Commit.

10 insert

11. Drag your Test case over to Run View and commit and run suite. How many test cases did you run now?

11. run

Conclusion

You have just used a Automation Data Source in both a JSON and  SOAP Service. Running multiple values through a unit test, vs manually entering these same values. What is important to consider here is putting the right values into the CSV file to test as many variables as needed. Using a Tool like SOAPSonar with a Automation Data Source, increases your coverage, and reduces the time taken to run test cases. Whats more, since it is not script bases, there should be little issue if any, running it again on the next code release., further reducing testing time.

Comments?

CloudPort for REST Response Generation

In SOAPSonar tutorial 3 we tested a simple chained service for a mashup. The first being a REST service look-up on google maps for distance between Toronto and Montreal, the second a calculation service to work out how long it would take to ride a bike at your own speed.

Now what if you are required to test the second service, when the first is not available? Does the team sit idle, resulting in project “Dead Hours”? Do you call a meeting, tell them to review test cases documentation, plan, take lunch what? The effect of Dead hours can somewhat be seen in my last post on Service Plan Costing

Why may a service not available? There are many of reasons.

  1. Lab is not available
  2. Network or connectivity is down
  3. You working from home/cottage/travelling
  4. Its a 3rd party’s service, and they have other testing
  5. The service is there, but you need to load test and the service does not allow for that
  6. The service data cannot be corrupted, etc.

Whatever the reason, what you need is something to respond the same way to a the same request, so that other test cases and automation does not fail. Now you could have development hammer out some code, get infrastructure and then installed it on a server, but that will take time and resources. Alternately you can use CloudPort.

1. Run CloudPort. This example is simple so we will just create a service and not capture one. Select Build Simulation. The proxy capture tool makes capturing more complex services and WSDL much easier.

1 build

2. File, New, Custom Simulation and then File, New, JSON Simulation Rule. Rename it to Montreal

2. New Service

3. Now the first thing we need to do is set up a network listener policy, the port and URI that CloudPort will run on and listen for requests. In Project Tree, select Network Listeners and enter a Name of Google Maps, leave the IP 0.0.0.0 and lets say port 8888. For the URI lets use a similar one, so only the port and machine are different. Enter /maps/api/directions/json/. Select the green check box to commit.

3.  network listener

4. Now we need to define request listener policy for a particular request string, URI or parameter. Select Add Manual Rule, URL Query Parameter and enter montreal. We now listening for a JSON query with montreal in it. When CloudPort gets that request, it will send the response we define in the step 6.

4 - New listener

5. Lets remove the default rule that matches all documents. Select the number 1 next to the default rule and select remove.

5 - delete default

6. Next we flip over the the Response tab. Now you could get creative and put in any response you like, but we do need that field with the distance. So to make this simple, I am just going to copy the response from the real sever into CloudPort. So long as we have the part we need we should be fine.

{
“distance”: {
“text”: “621 km”,
“value”: 621476
}

For fun I added a line at the top “note”: “this is a CloudPort simulation and not the real service”, and left the same as before.

6 response

7. Not that we needed it, but just in case, I will define the distance as a variable. Select Response Runtime Variables and scroll down to the value (distance in meters) and right-click, add variable reference.

7 runtime

8. We could now clone this for as many different queries as we need, changing just the query listener and the response.

9. Lastly I want to add a error service. Right-click on tests, New JSON Simulator and rename it Error. Since its after the first rule, we will leave the default catch everything, and in the response, I had some fun with the error code and message.

9. error

10. Time to test it out. Save your project then start local simulator with project. See the URI for the service is displayed on port localhost:8888?

10 run view

11. In SOAPSonar, lets make a slight change to test case. Clone it and past http://127.0.0.1:8888/maps/api/directions/json/ into the host and path. Leave the query the same. Commit and send. Can you my response. Note my added field? In every other way, this response should be the same. If you replace Montreal with some other city, what do you get?

11 SSonar

12. Back in CloudPort’s runtime player, you can see the transaction.

12 Runtime

Conclusion

In a few minutes you have ritualized a simple web service. What’s better is that the runtime player is free. That project you created, can be used by as many people in your or outside of your organization as you may wish to share it with.

Virtualizing or simulating a service is a quick way to remove many of the environmental factors that testing has to deal with on a day to day basis. From creating early mock-ups to trouble shooting performance, there are literally hundreds of use cases.

It was pointed out to me that for a single static response like this, you could use the FREE Runtime player and dont need the licensed service creation aspect. That said, the tutorial is valuable if you wish to extend this to multiple requests and responses and more complex workflow.

Comments?

3. SOAPSonar – Run View with Chaining

If you have not, please do Starting with SOAP and REST Tutorial first.

Automation lets you test the business flow scenarios. So now lets model a very simply business flow. Lets take an example, the company uses a 3rd party API for calculating distance between cities. This is a REST service. They have a second API that they use to calculate. The Client application makes use of both. The test requirements are that users are expected to calculate the time it would take to ride a bicycle between Toronto and Montreal if you travelled and average speed of 20 km/h. To do this we set up out test cases in project view and run it in Run View. But to automate this, we need the response from one service to be the input into the second. This we at ST3PP refer to chaining services for automation.

SOAPSonar Test Cycle

TUTORIAL

1. Open SOAPSonar, and lets first add the REST distance service. In this case I am going to use Google Maps. File, New, Test Group. Then right-click on Tests in the Project Tree and select New REST Test. It’s always good to give names to things, so right click on New Test_1 and Name it Distance.

1 Distance

2. Paste the following in to URI field.

http://maps.googleapis.com/maps/api/directions/json?origin=Toronto&destination=Montreal&sensor=false&avoid=highways&mode=bicycling Make sure Method is GET and then Commit and Send.

2 Send

3. In the Response section we interested in the distance. Unless Montreal and Toronto are floating apart, you should get 621 km at 1 day 8 hours. But at what speed? Select the tab Runtime Variables, then scroll down till you get the distance value field of 621476 (meters). Select this value number and right-clickAdd Variable Reference. Name it Distance. OK, Commit.

3 add vairable

4. In Tutorial 2 we used a SOAP calculate function, lets add that. Since SOAP comes with WSDL, just paste

http://www.html2xml.nl/Services/Calculator/Version1/Calculator.asmx?wsdl into the capture WSDL bar.

4. capture calc

5. Now on Divide_1right-click and Clone,  twice. Renaming the the first to KM and the second to Hours.

5 Clone

6. Select KM and we need to enter the response from distance in Meters, into a = and b= should be 1000, the response needs to go into hours. in a= right-click, [RV] Runtime Variable, New Custom Group, distance. Set b= to 1000. Then Commit and Send.

6 KM

7. In the Response tab,  select Runtime Variables, then Divide Result and right-click. Add Variable Reference and name it Distance_KM. Notice the tab shows Runtime Variables (1) now?

7 RV km

8. Lastly we need to divide that response by 20 km/h. Select Hours in the project tree, in a= right-click, Select [RV] Runtime Variable, Calculator.asmx, Distance_KM variable. then b=20. This should be the result we have being asked to model.

8 Hours

9. Switch to Run View and drag Hours test case under the DefaultGroup. We should name that our scenario.Notice that Distance and KM are known prerequisites and so get added automatically.

9 Run view

10. Make sure we use the Test Case Success Criteria as we have not captured a baseline and lets Log Fail Only. Make sure you not Publishing this to HP Quality Center Project. Commit and Run suite.

10. Run

Conclusion

You automatically placed into Real Run Monitor, but we talk about Report view and logs in next post. Save your project as Tut3.

You have just automated a test scenario of 3 unit tests across both REST and SOAP API’s that reside on different systems and at different locations (external) to your network. Yes you could have done this faster manually the first time, but we will look at ways to baseline and monitor as well as use this example for more locations or different speeds.

Comments? Please share any thoughts or provide feedback so others can learn.

2. SOAPSonar – Starting with SOAP and REST

So you have installed SOAPSonar and it’s registered as is detailed in this earlier tutorial. Were now do you start? First let me explain how SOAPSonar works. SOAPSonar is device independent, and requires no client or client application in order to test the Web Services API. It sends requests directly to the Web Services API, and receives the response.

SOAPSonar Test Cycle

The SOAPSonar Interface is divided at the top into 3 Views. Project View, Run View and Report View. In Project View we create the individual test cases, defining data source, variables and success criteria. In Run View we combine these test cases into automated test scenarios, by dragging or linking the independent test cases created.We can also define virtual agents, for load testing and logging option. In Report view we see the results of the independent test cases that are run, compared against the success criteria we established. The logs provide addition detail on for further trouble shooting errors. On the right is 4 modes to run the tests in.

SOAPSonar headingsQA Mode, Performance, Compliance and Vulnerability. SOAPSonar uses the same test cases created in Project View, and Test Scenarios in Run View, to run in any of these modes, yet provides different reports.

A SOAP Based API

SOAP Web Services API, provide a WSDL, which can be captured by SOAPSonar and used to automatically generate a UI. For example if you put http://www.html2xml.nl/Services/Calculator/Version1/Calculator.asmx into your browser, you will see a free basic SOAP service example for calculation.

If thiis service seems to be down try http://www.w3schools.com/webservices/tempconvert.asmx?wsdl

1. Make sure you are in project view and QA mode. Place that same link into SOAPSonar’s Capture WSDL bar and add ?wsdl afterwards or paste http://www.html2xml.nl/Services/Calculator/Version1/Calculator.asmx?wsdl Then select Capture WSDL or press enter, you can automatically import the available services. If you look on the left, in the project Tree, you will now see a service called Calculator.asmx which has 4 services, Add, Subtract, Multiply and Divide.

Capture SOAP WSDL

2. If you select Documents you can view the WSDL and Embedded Schema.

View Schema

3. Now lets see the automatic UI for the Add service. Select Add_1 service. In the main section, there is a Request section on top, and under that a Response section. Lets start simple and enter a= 2 and b= 2 then the green check mark to commit the test settings and the blue arrow to send current request to server. If you look at the Response section, you should see the result is 4.

send test

4. If you select the XML tab at underneath the Request Section, you can view the XML Request that was sent. Changes in the Schema Fields or here are mirrored. Change the a field in the XML by changing the 2 to a 3 in <tns:a>3</tns:a> then then the green check mark to commit the test settings and the blue arrow to send current request to server. Does the response now read 5?

XML send

REST Based API

REST based API do not provide a WSDL that can be captured. Their lightweight nature, requiring a bit more knowledge or documentation.

1. To start a REST test, select File, New, Test Group. You should then get NewCustomGroup1 in the project Tree. If you right click in it you can rename it REST Demo.

New Rest Test

2. If you Select Tests, then right click and and select New REST Test, you will see a similar but slightly different Request and Response section.

3. Lets Check the Bitcoin price. In the URI in the rest section, paste https://btc-e.com/api/2/btc_usd/ticker and leave the method as GET. then the green check mark to commit the test settings and the blue arrow to send current request to server. What did you for a response? My high I got was US$584 today.

Bitcoin Request

4. Notice that by pasting in the URI, it is then broken down into Protocol, Host, and Path. Right click on the New Test_1 and rename it BTC_Bitcoin.

5. Please save your test plan at this point for the next Tutorial on Run View.

Conclusion

Well now that you have some idea how to start a REST or SOAP Test case development, take a few minutes to try a few additional service or services from your own environment. Try a BBC Music artist

http://www.bbc.co.uk/music/artists/ada7a83c-e3e1-40f1-93f9-3e73dbc9298a

or SOAP Soccer information service

http://www.xmlsoccer.com/FootballData.asmx?WSDL.

For that matter, Facebook, twitter and many other companies offer API’s that can be used, although some require a developer registration and key first. Perhaps you have a service you familiar with you would like to try?

We now have some idea of project view and how to start with a SOAPSonar project. next we will look at Run View and how to use some of these unit tests.

Comments and question below will help others learn.


Installing a SOAPSonar License Server

SOAPSonar comes in a per seat and floating license models. Floating license are popular for occasional users and offshore sharing as they allow SOAPSonar to be installed on as many users machines as you would like, and only counts concurrent users.

The license controller application is only used briefly on checking out of the license and checking the license back in. The instance of SOAPSonar still runs on the local machine. As such minimal “server” load and network is required. The license controller is in fact a small process that runs on a windows machine, which requires a static IP address. On my machine its says its using 20,000k of memory, about 33% of chrome and the entire file is only 4.2 MB.

1. To install the license Controller start by downloading it from here. Install this on your server with Admin Rights. Once installed, although I try keep this post up to date, please check immediately if this is the latest version.  To do this, run the license controller and select Updates, Check for Updates.

1. Check for updates

2. Make sure the the process is running and automatically starts on your server. If the service is unavailable, license will not be available to check in or out. Right-Click on the icon in your tray, and select Manage Licenses.

2. Process

3. Every server is fingerprinted, and your licenses tied to that server. Select File, Show Server ID, and copy this value. Send this FingerPrint ID to [email protected]

3. Show Server ID

4. Your license will then be generated by Crosscheck Networks for that server ID, and we will send you back your license key. Select File, Add Licence Key and paste your license. Select OK. Each group of licenses should now show as a line item.

4 Add key

5. Select File, Preferences, and confirm and on the License Server Settings tab, confirm your port number. Run cmd, then enter ipconfig to get your IP address. These are needed for users to connect to the server.

5 port and IP address

6. On the second tab, Client Installation Version Control, you can set the minimum or maximum version and the download location to ensure that your team uses the same release. This is helpful if you sharing projects.

Versioning

7. Statics offers a way for you to see which users use what licenses and how often. Enabling planning between seat and floating licenses.

7 Statistics

 8. On a workstation, download and install SOAPSonar. Its important to do this by right clicking on file and run as admin, for access to .Net libraries. Select Registration, Use License Server8 Check out

9. Enter the IP address and Port of your license server, Select Key Type and Request License.

9 connect

If you have any question, please just reach out to me.